Tuesday, February 28, 2012

Upcycled Raglan T-Shirt

Personally I find raglan t shirts darling! I don't know what it is about them, but I just think they are so cute! I love them on boys & girls alike! I need to make Nathan some now!

This is a refashion of two of my old shirts, a tank top from Holister (the center panels) and a maternity shirt from Old Navy (the arms). Making a raglan turned out to be super easy! Just like making a normal shirt, but the "shoulder" seams were just located lower and there were two for each side! No biggie!


This is what she looked like at the end of the day!
She likes to keep up with Nathan!

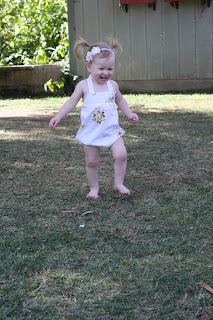
Vintage Sheet Romper

I've mentioned it before I have a thing for vintage textiles. And by 'have a thing' I mean I hoard them! Like I have more then I know what to do with, yet I can't stop buying them at thrift stores and estate sales! I love 'em!  Honestly they are a useful thing to hoard though! I mean table clothes, sheets, napkins, pillow cases, hankins...all useful items for their intended purpose and hold such great potential! That's my story and I'm stickin' to it!

Case in point. This lovely vintage sheet upcycled into an adorable vintage romper for Sydney! You know reduce, reuse, and recycle is all the rage these days. I'm just doing my part! Plus it's a million times cheaper to sew with a vintage sheet I picked up for a buck, then it is to go to the fabric store!


Minor confession time...I may or may not have purchased a romper from Old Navy just to trace it, then returned it the next day! What? I needed a pattern okay?! Enough with the chit chat, here it is the vintage sheet Romper!

Wednesday, February 22, 2012

Brother Serger

This Christmas I was given a SERGER! It was something I had been wanting but was (like always) to cheap to buy myself one! I recently took a class at a local sewing shop to learn the ins and outs of it, and let me just say I'm in love with it!

It has made making clothes with knits  look so much more professional and finished, it handles knits like a dream, and has been a fun learning experience! I'm still learning to do different things with it, and getting the tensions all figured out. But all in all if you are at all into garment construction, or selling your creations a serger is something I would totally recommend!

Tuesday, February 21, 2012

Making Sydney a Bathing Suit

The first question Alex asked me when I made this was "Why did you make her a swimsuit? Wont' she out grow it before summer?" Probably true since it came out a bit tighter then I had hoped but of well! It was a learning experience and I'm really happy with it!

First of all I've been wanting to make her a suit, but finding swimsuit material proved much harder then anticipated. But I walked into Walmart one day and right there in front of me was clearance plus sized women swimwear...are you following me? Hello 3xl booty short biniki bottoms for $3! I tossed a few colors in our cart and happily went on my way! The cashier looked at me a bit funny, but I was excited!


In usual pattern making fashion I traced a gymboree suit she already had (read about pattern making here) and set out!

The seams on the suit made it a lit difficult to get two good pieces out of one, so I left one seam as an under the boobs seam!


Sewing with the swimsuit material was actually a breeze! I was fully prepared to mess with settings and get frustrated, but it sewed up in normal setting like a dream! I made the suit itself from one biniki bottom and the ruffles were from another, the neck tie is the side ties of the original bottoms!


So now I'm on the hunt for adorable swimsuit prints so I can make her more!

Monday, February 20, 2012

Happy Marti Gras!

Looks like I'll have good luck all year long! Excuse the larger portion sizes we had to cut the whole cake into 4 pieces to insure one of us got the baby! It's gonna be a good year! Hope you had a great 3 day weekend! I've got non stop sewing posts lined up for you all week!!

Friday, February 17, 2012

American Girl Clothes

I've been sewing up some clothes for my cousins American Girl dolls as a birthday gift. I have made 2 matching skirts and one for her. Then 3 dresses. My friend let me borrow her doll as a model!

Monday, February 13, 2012

Valentines Projects

It's been a bit! I've been busying sewing, crafting and reading! I really am going to work on photographer projects within 24 hours of completion! So then I can blog about them! Here is a round up of all my Valentines Projects I've been working on this week and last!

Felt Heart Garland

Pottery Barn Knock Off Felt Envelopes

I 'dig' you Valentines

I 'wheelie' like you Valentines

'Orange' you glad we're friends
(oranges borrowed from the out of town neighbors tangerine tree) ;-)

Grandma we can a prefect 'pair'. Cuz grandma loves socks!

What kind of fun Valentines have you been up too?

Thursday, February 9, 2012

How to draft a pattern

Ever since I learned how to draft a pattern I feel like my sewing has gone to a whole new level. I am so much braver and feel so much more confident! I hope after we draft a pattern together you feel the same way! Lets get started shall we!?

First you will need:
A shirt (jacket, pants, dress) that fits your child well
Paper (either normal paper taped together, or a large roll)
Scissors ( not your fabric ones)
Pen

Optional:
Second pen
Tape

Okay so first you lay out your paper (or tape it together) so that it is big enough to lay the shirt on twice.
Fold the shirt in half so you are looking at the back. Line the side seams up as best you can. Lay it on the paper flat as you can.


Trace the shirt. label it "back" and write fold on the side that was folded.


Turn and fold it so that you are looking at the front, again line the side seams up as best you can. But this time you need to tuck the neck area in so that the front neck scoop (collar area) is exposed. You will see that the neck raises higher on the back of the shirt then on the front. Trace the shirt, make sure you get a trace of the front neck not the back.


Now trace the sleeve in the same fashion you did both sides of the shirt. But just lay the shirt flat.
Now when you get to where the sleeve meets the body of the shirt draw a line out so you know where the seams meet. Do this at the top of the sleeve (shoulder) and the bottom of the sleeve (armpit).  See the photo above.


Remove the shirt now that you are done tracing it and draw a curved line to connect the two seam lines you drew. Mimic the line of the sleeve seam that is on the shirt to the best of your ability. Label it and make sure to write fold on the top line, where the sleeve you traced was folded (the top of the arm)


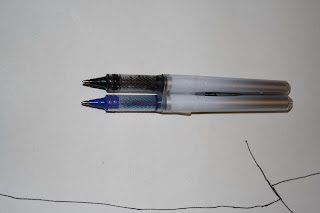
Now you should have a front, back and sleeve drawn! Yay good job! So here you have two choices you can a) tape the second pen to your pen for an instant seam allowance or b) just cut your pattern a little wider then the lines you drew evenly all the way around.


For this tutorial I did the two taped pens, but honestly I prefer to just cut a bit wide. I find that I don't sew my seam allowances that wide and my shirt always ends up bigger then I wanted. So do what you feel would work best for you. No need to add any type of seam allowance on the "fold" sides!


Now that you have your pieces cut. lay your original shirt on top to ensure you are on track!  Now you have a basic shirt pattern! Since is it just a basic shirt you can use this as a starting point for dresses and numerous other types of shirts!

I'd just like to add that when using this pattern to make a new top keep in mind the fabric that the shirt you traced was made of. If it was a stretchy cotton, you will need to use a fabric with a little bit of give (stretch) for your new top. And if you'd like to use a quilters cotton, which has no stretch then you will need to add a few buttons, or snaps so if will go over your child's head!

Hope this helped you learn how to draft your own pattern from a piece of clothing you already own! Best of luck! If you have any questions feel free ask!


Wednesday, February 8, 2012

Valentines Hat

My husbands aunt knits, and she has made Nathan more hats then I can count in his 3 years. She is really good, and has tons of books that I have picked patterns out of for said hats.

She made this hat for Nathan's 2nd Valentines day. Simply, not too girly, just enough for the holiday spirit on a young toddler. I recently cleaned out Nathans closet and fell back in love with  a lot of his hats. I tried some on Sydney and this one fit nicely. I thought it would be a cute Valentines hat for her too! I felt good about giving it a second chance at life, and I knew our Aunt Terry would love to see her wear it!

I felt like it needed a little something more, a touch of feminine beauty! So I made this somewhat large white felt flower! It was really simple and went faster then I had expected! Love that!


I have been sewing like crazy! I need to get better about taking pictures as I finish a project! I can't wait to show you the BATHING SUIT I made Sydney yesterday!

Monday, February 6, 2012

Momma Lessons...

Sometimes, okay most of the time being a mom is the hardest thing I'll ever do.
And I'm going to be doing it for the rest of my life...awesome.
But really it is awesome, the good out ways the bad easily. But there are bad days and those bad days weigh on me like a brick. I want to always do the "right thing" but it's really hard to teach them that when I'm not even sure what I would have done in that situation.

Today Nathan was faced with a choice, a choice to be bullied or to do something about it. What a fussy line  bullying presents. You hear about it all the time, but it never really hit me until today how real and hard it is. I cried, I probably would have cried regardless of the outcome. Simple because I saw bullying. and parents not doing anything about it. How? How can you sit there and let that happen?

Nathan did what, honestly I think most kids in his position would have done. He was bigger then the bully and he let that be known. Not "the right" thing to do, as we do not hit. But he had tried using words, and then was trying to get to me. You got in his way, trying to be mean. Well you ended up in tears. Tough luck babe! Hope you learned!

But hitting is never okay. So I'm torn. Be bullied or stand up for yourself when you are trying to get away...

Have you experienced bullying yet? If so how was it handled?
Saturday, February 4, 2012

Friday Night

This is what Friday night looked like in our house...


Tri-tip


Twice baked potatoes


Secret family recipe Blue Cheese Salad


Mimosa

Hope your weekend is off to a great start too!

xoxo!

Thursday, February 2, 2012

Jacket for S!

Since learning how to make patterns I feel like I have gotten much braver with my sewing attempts! I decided that Sydney needed a jackect. Does anyone else have issues with little kids jackects never fitting right, or rolling up in the front? Maybe I'm crazy, or need a launfry lesson. Who knows! All I know is that her jackects just don't seem to fit right!

So I drafted a pattern for this jacket. I cut the pieces and kinda made it up as I went! It fits her well, is long enough so that when being held her belly isn't out catchin a few rays, and it doesn't curl up in the front!